A practical guide to installation, configuration and field operation
Welcome to our installation and tuning guide for the latest performance module from Closer GPS. This tutorial covers preparation, mounting, calibration, field‑testing, fine‑tuning and ongoing maintenance.
The Rally Tripmeter V1 and V2 are purpose-built GPS tripmeters designed for competitive rally environments. Both devices share the same core principle—power, wait for GPS lock, and drive—but each model offers a specific feature set and user flow.
This guide consolidates the essential operational procedures from the official manuals, helping new users perform their first install, configure the unit correctly, and understand the core functions used during stages and recce.
1. Installation and Power Setup
Mounting the Device
Both units provide dual rear M4 threaded inserts (48.5 mm spacing) compatible with RAM-type mounting systems, supporting:
-
Windshield suction mounts
-
Dashboard adhesive bases
-
Roll-bar clamp fixtures
Recommendations:
-
Maintain clear sky visibility for reliable GPS lock.
-
Position the display so the crew can read and operate it without glare.
-
If needed, install remote buttons for Trip Reset or Stopwatch in easier-to-reach positions.
2. Power and Startup
Power Sources
Both devices support:
-
12V vehicle supply (rear connector: red = +12V, black = GND)
-
5V USB-C from charger or powerbank
Rules:
-
Do not connect USB-C and 12V at the same time.
-
Add a 1A fuse on the 12V line.
-
Ensure the side switch is in OFF before connecting power.
Powering On
-
Connect power.
-
Move the side switch DOWN to turn the unit ON.
-
The GPS LED flashes while searching satellites.
-
When the LED becomes solid, GPS-based functions (Trip, Speed, Time) are active.
The internal capacitor prevents the unit from shutting down during brief voltage drops (engine start, accidental cable movement).
3. Immediate Use
Switching Pages
Both devices cycle displays using the black button (short press):
-
V1: Trip → Time → Stopwatch → Speed
-
V2: Time/Trip2 → Trip1+Trip2 → Speed/Trip2 → SS Log
4. Essential Functions
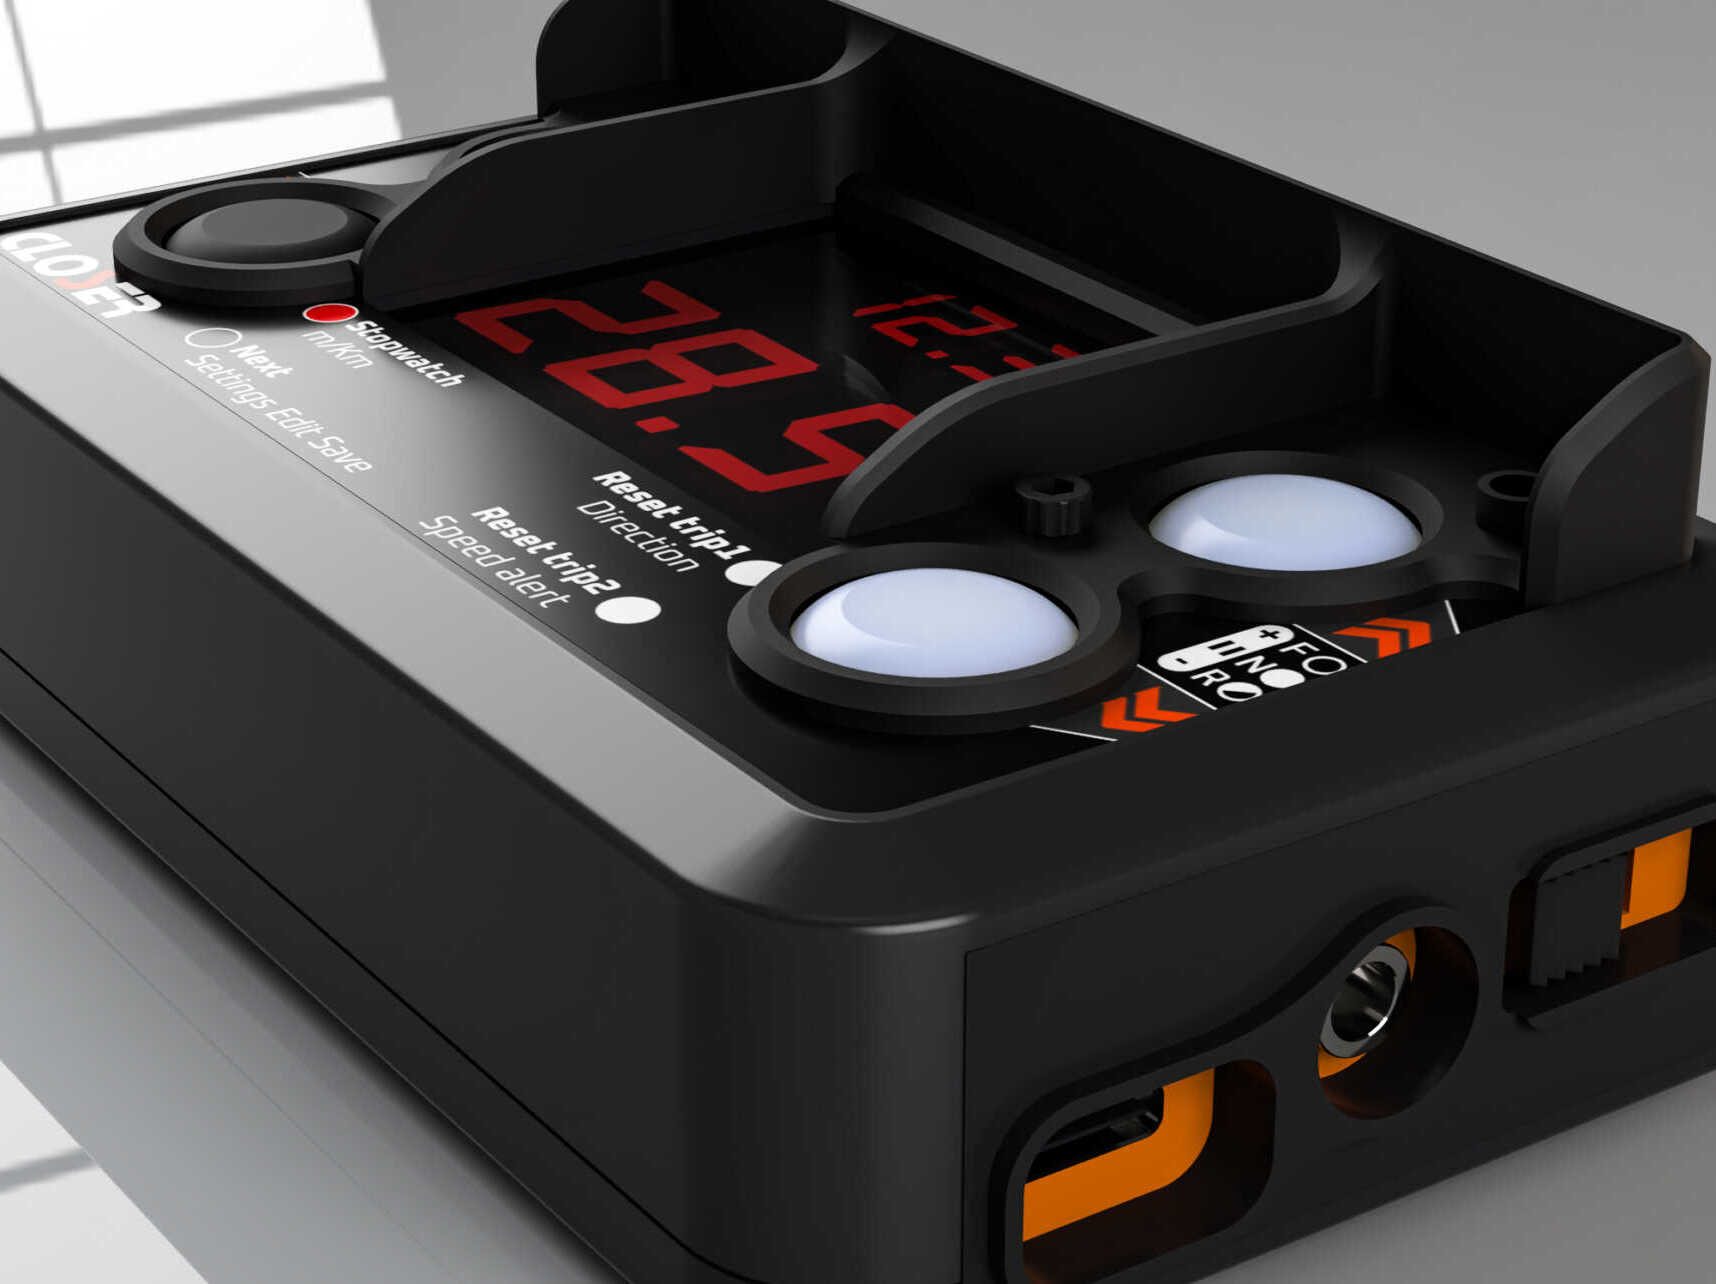
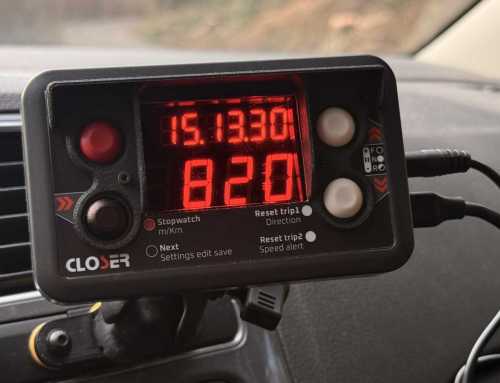
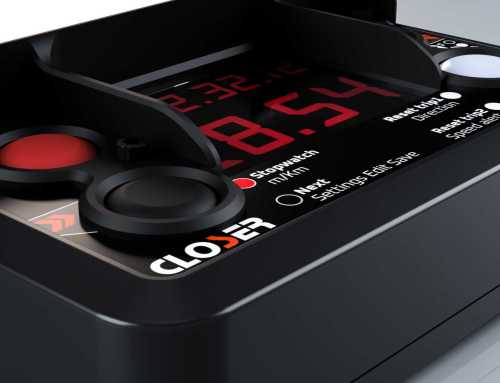
Tripmeter
-
V1: Big white button resets trip.
-
V2: Upper white resets Trip1, lower white resets Trip2.
Direction change (both models):
Long-press the related white button → LED states:
-
Off = Forward
-
Fix = Pause
-
Blinking = Backward
Speedometer & Speed Alert
-
Speed appears automatically after GPS lock.
-
Speed Alert:
-
V1: set via long-press black on Speed page, activate via small white.
-
V2: set via Settings (“S.ALErt”), activate via long-press lower white.
-
Stopwatch
-
Press Red to start countdown to the next full minute.
-
Timer starts automatically at 00, on vehicle movement, or by pressing Red again.
-
Press Red to stop; press again to reset.
5. Ready to Drive
Once the device is mounted, powered and GPS-locked, you can immediately:
-
Reset the trip at the start of a section
-
Monitor speed through GPS
-
Use the stopwatch for stage timing
-
Switch direction when correcting distances
-
(V2) Operate dual trips or quickly swap between meters and kilometres
This is the minimum required procedure to get your Tripmeter operational in seconds, fully consistent with official documentation.
If you’d like, I can also produce a print-ready laminated quick sheet, a V1-only or V2-only version, or a graphics-based quick start card.
